
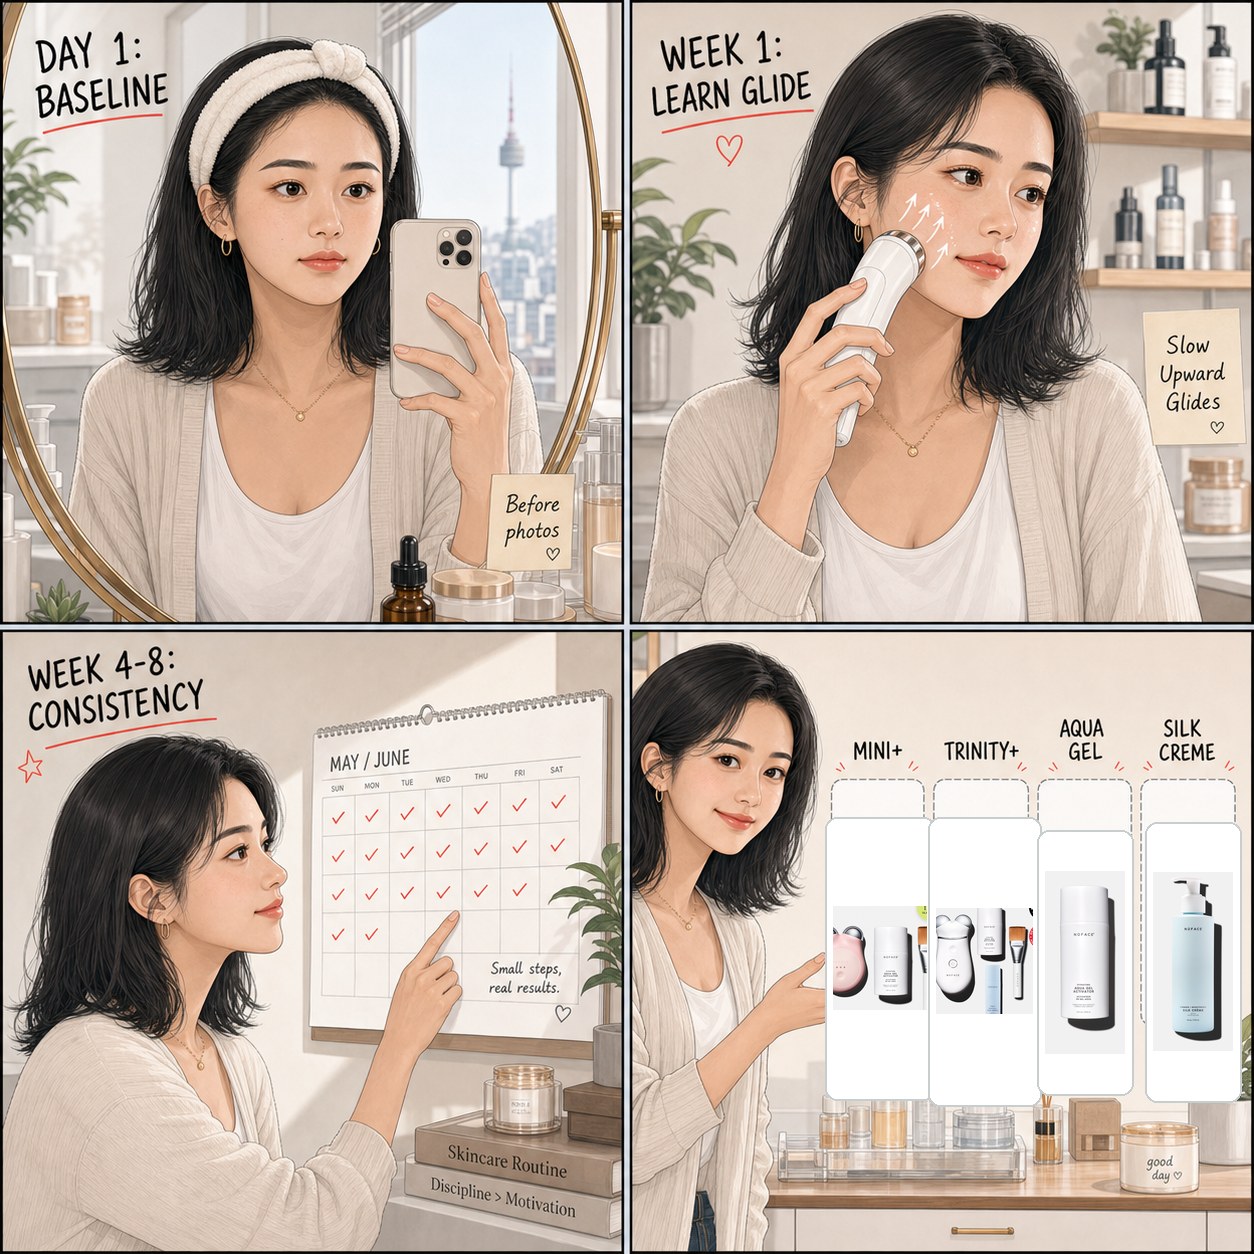
Short verdict: a realistic NuFACE before and after timeline is less dramatic than TikTok makes it look. Day 1 is mainly about taking baseline photos and learning the glide. Week 1 is about getting enough gel and technique right. Weeks 4 to 8 are where you can judge whether the habit fits your life. If you want the easiest starter route, choose NuFACE MINI+ with NuFACE Aqua Gel. If you want the more serious device, choose NuFACE Trinity+. If clear gel feels too light, compare NuFACE Silk Creme.
Affiliate note: this post contains Amazon affiliate links. If you buy through them, I may earn a commission at no extra cost to you. I checked current NuFACE MINI+, Trinity+, Aqua Gel, Silk Creme, and Amazon product links on July 7, 2026. NuFACE positions its devices around microcurrent facial toning and a 5-minute routine, but your exact device page and manual should always guide use.
Real talk: before-and-after content can make NuFACE feel more confusing than it needs to be. One person posts a dramatic cheekbone angle. Another says nothing happened. Someone else is clearly using different lighting. Then you are staring at your face after one session, moving your phone around the bathroom, trying to decide if your jawline looks different or if the overhead light is lying.
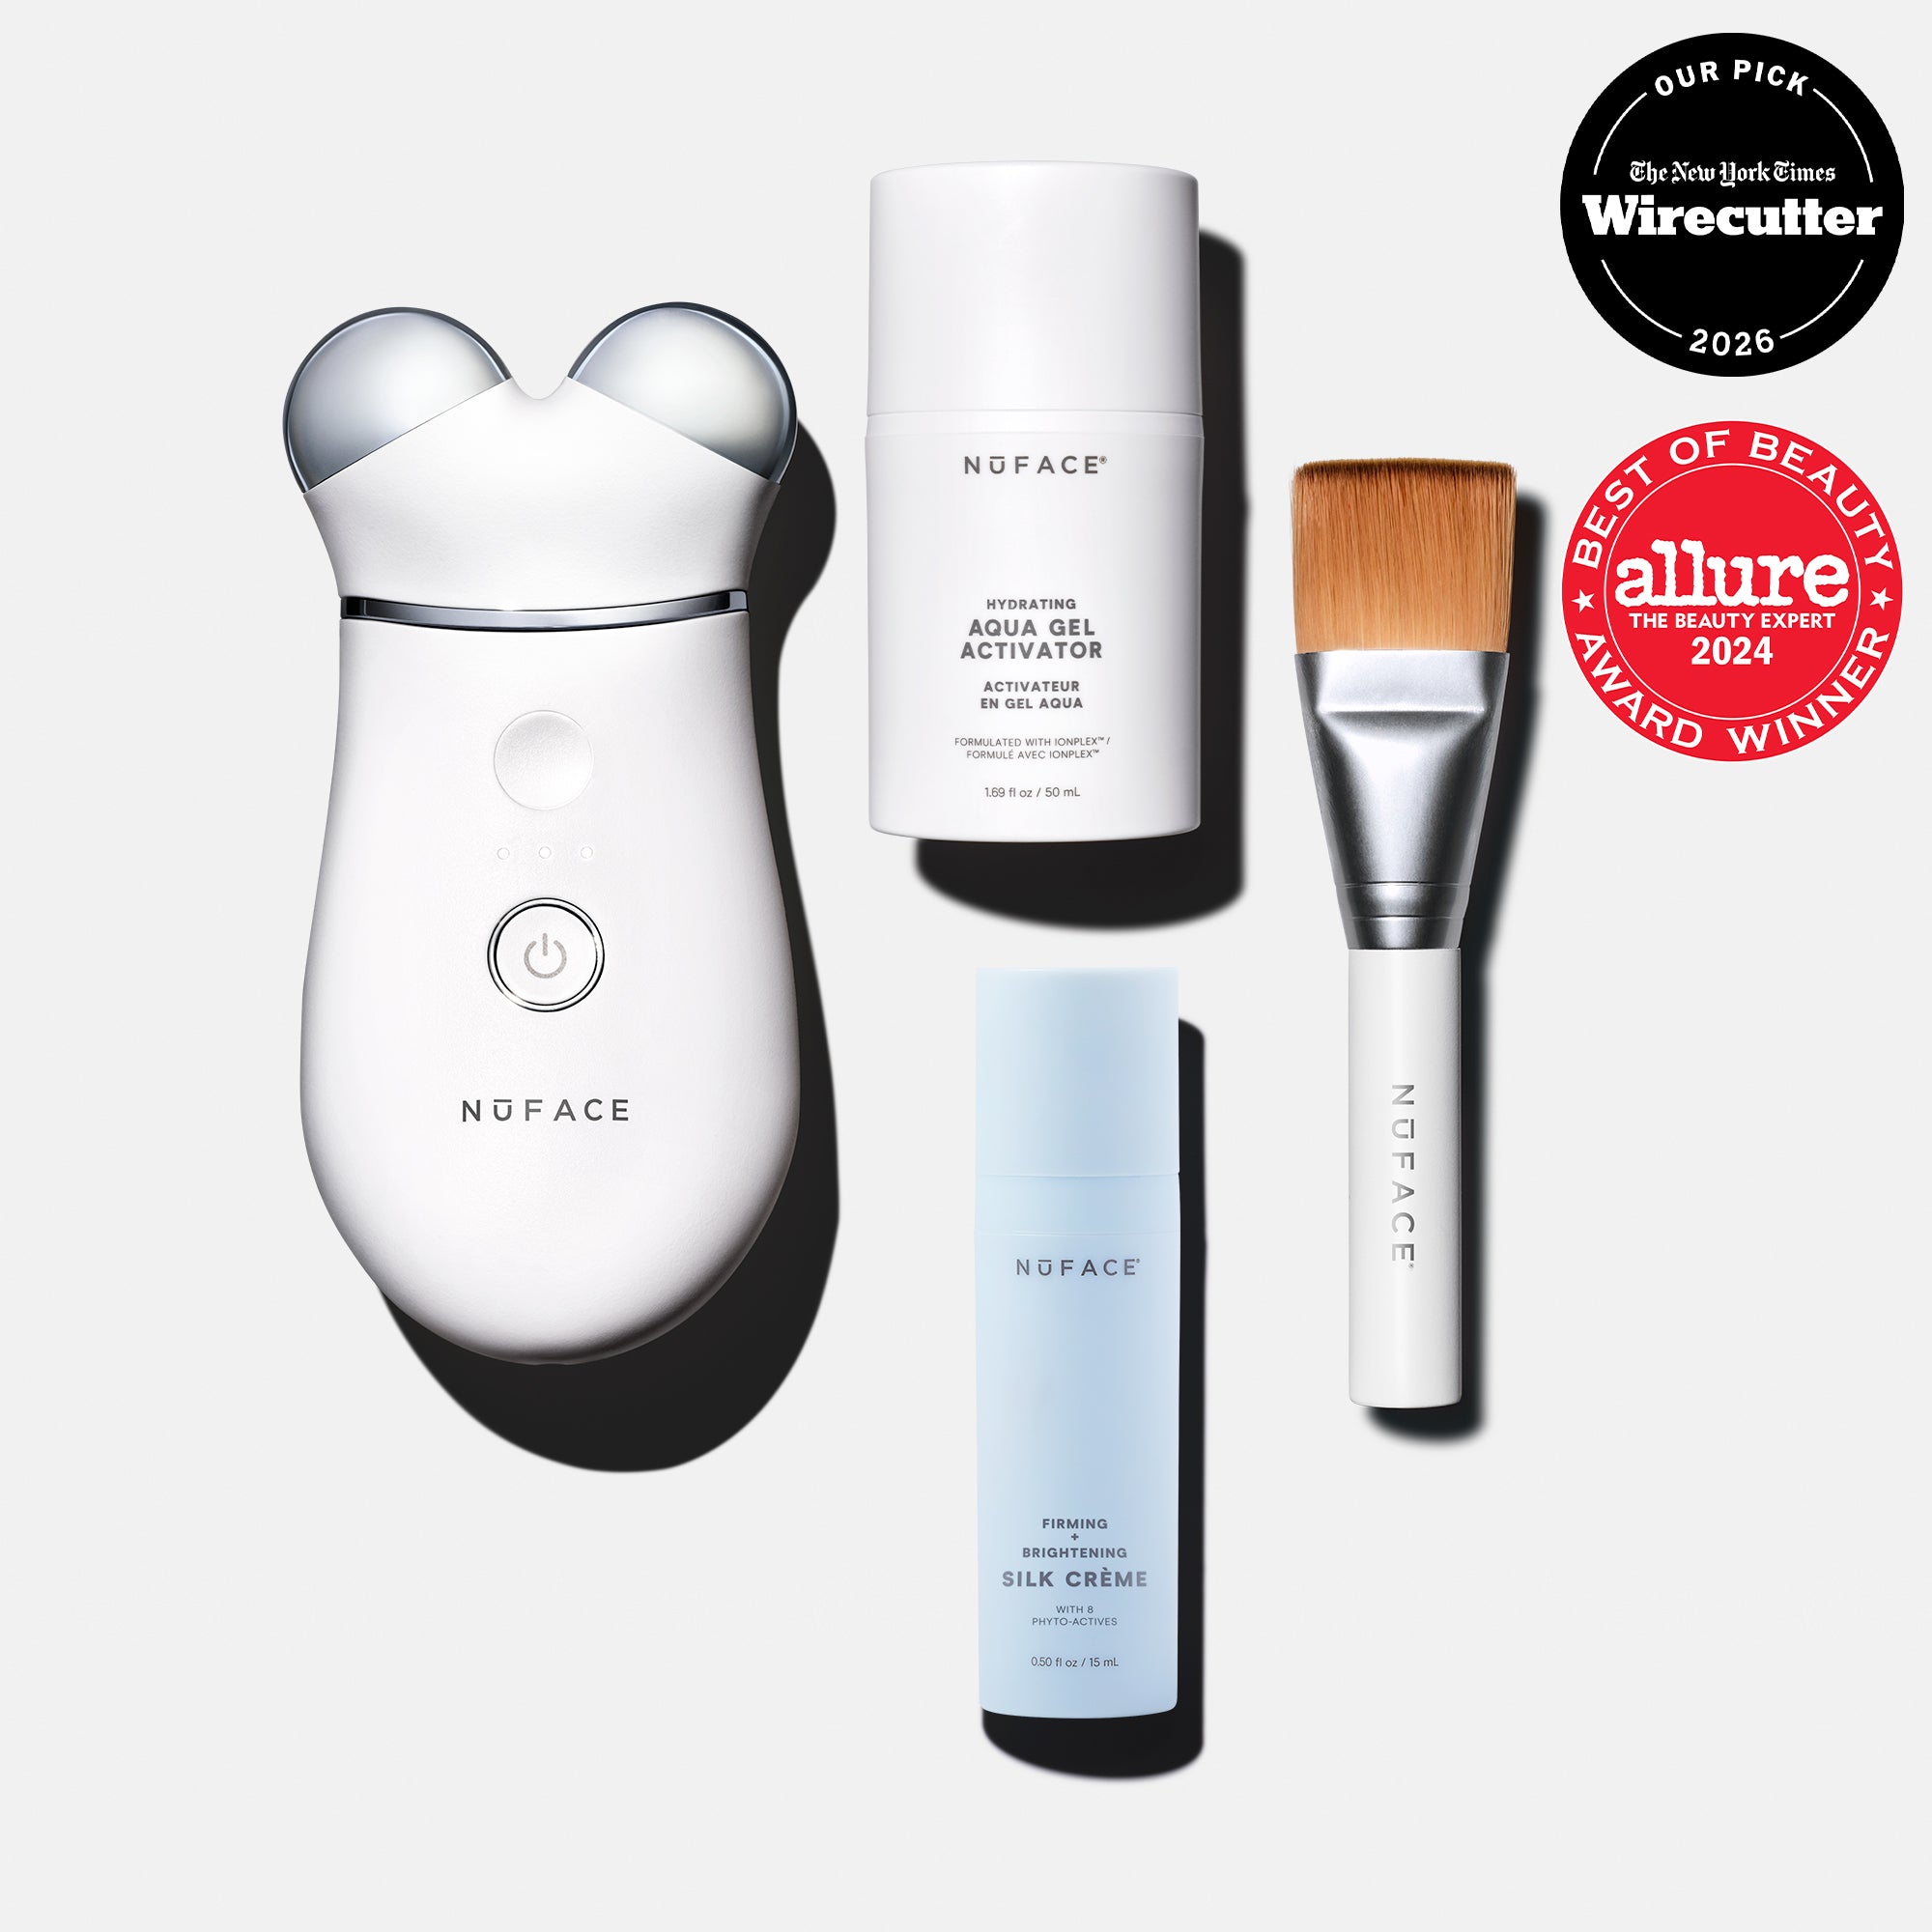
Actual Products Mentioned
Use these product photos to match the packaging before you click through or compare listings.
That is not a great way to judge a device.
NuFACE is better understood as a habit product. You need clean skin, enough activator, slow glides, realistic expectations, and enough repeat sessions to know whether it fits your life. The before-and-after question is fair, but the answer needs a timeline, not one overedited selfie.
This is the timeline I would use if I were starting fresh: take baseline photos on Day 1, learn the feel during Week 1, judge the routine around Weeks 4 to 8, and decide whether your device and gel setup are realistic before buying more accessories.
The Realistic Timeline
| Timeline | What To Watch | What Not To Expect |
|---|---|---|
| Day 1 | Baseline photos, gel amount, device feel | A permanent face change |
| Week 1 | Whether the routine feels smooth and repeatable | Perfect technique from the first session |
| Weeks 4 to 8 | Consistency, comfort, photo comparison under same lighting | Clinic-level lifting from a home routine |
| After 8 weeks | Whether the device earned a permanent spot in your routine | Results if you barely used it |
If you need the full step order before tracking results, start with my NuFACE routine for beginners. If your first sessions feel bad, read NuFACE mistakes beginners make before deciding the device is not for you.
Day 1: Take Baseline Photos Before You Touch The Device
The most useful thing you can do on Day 1 is take boring baseline photos. Same room. Same lighting. Same distance. Same facial expression. Hair pulled back. No contour. No filter. No trying to find your best side.
Do a front photo, left side, right side, and a relaxed three-quarter angle if you want. You are not making content. You are making a fair reference point for yourself.
Then set up the routine. Cleanse first. Pat skin dry. Apply enough activator to one section. Use the device as directed for your exact model. Do not start with random skincare underneath, and do not try to make one session prove the whole purchase.
If you are brand new, the cleanest setup is NuFACE MINI+ plus NuFACE Aqua Gel. If you already know you want the bigger NuFACE routine, Trinity+ is the more serious cart.
What You Might Notice After One Session
After one session, some people feel like their face looks a little more awake or their routine feels more intentional. Some people notice nothing. Both are normal enough that I would not overread either one.
The better Day 1 questions are:
- Did the device glide smoothly?
- Did I use enough gel?
- Did anything sting or feel wrong?
- Was the routine realistic for my schedule?
- Did I understand the device path?
If the answer is no, fix the setup before judging the result. A messy first session is not a real before-and-after test. It is a practice run.
Week 1: Learn The Glide
Week 1 is not about becoming a NuFACE expert. It is about learning the feel. The device should glide. The gel should stay wet enough. You should not be dragging, pressing hard, or rushing.
This is where people make the most common mistake: too little gel. If the product layer is thin, the device can tug and the whole thing feels less pleasant. That can make you think the device is too much for you when the real issue is the activator layer.
Start with Aqua Gel. If your main problem is that the small bottle makes you stingy, compare Aqua Gel 10 oz. If your skin feels dry or tight with clear gel, compare Silk Creme.
For more detail, read how much NuFACE gel should you use and why does NuFACE gel dry so fast.
Week 2 To 3: Decide If The Habit Fits
By Week 2 or 3, the most important before-and-after is not your cheekbone. It is your behavior. Are you using the device because it fits your routine, or are you avoiding it because the setup feels annoying?
This is the honest point where device personality matters. MINI+ makes sense if you want a smaller, lower-pressure routine. Trinity+ makes sense if a more serious microcurrent routine sounds satisfying, not burdensome.
Do not keep pushing a routine that your life is clearly rejecting. If the device stays in a drawer because it feels too involved, the best device on paper does not matter. If you want the device comparison, read NuFACE Trinity+ vs MINI+.
Weeks 4 To 8: Compare Photos Fairly
Weeks 4 to 8 are a better time to compare photos than Day 1. Not because everyone will have a dramatic transformation, but because you have enough time to judge the habit more fairly.
Use the same lighting, same camera distance, same angle, and same expression. Do not compare a sleepy bathroom selfie to a sunny window selfie. That is not skincare tracking. That is lighting fan fiction.
Look for practical signs:
- Does the routine feel smoother now?
- Are you using enough gel without thinking too hard?
- Do you like how your face looks right after the routine?
- Does the device fit your morning or night rhythm?
- Are you still motivated without forcing yourself?
If the answer is yes, the device may be worth keeping in your routine. If the answer is no, the honest problem may be habit fit, not product quality.
The Photo Checklist I Would Use
If you are going to track a NuFACE before and after, make the photos boring. Boring photos are useful photos. Pretty photos are usually too easy to manipulate by accident.
Use this checklist:
- Same room and same window direction.
- Same time of day if possible.
- No contour, highlighter, or heavy base makeup.
- Same camera distance and lens.
- Same expression, especially around the mouth and jaw.
- Hair pulled back the same way.
- No dramatic chin angle.
That last one is important. A tiny head tilt can create a fake jawline difference faster than any device. If you are trying to decide whether a product is worth keeping, do not let angles make the decision for you.
I would also write down the routine context. Which device did you use? How often? Which activator? Did you treat neck too? Did you use enough gel? Did you skip two weeks? These details matter more than one random photo comparison.
When The Timeline Fails
A NuFACE timeline usually fails for boring reasons. Not enough gel. No routine. Too much expectation. Wrong device for your personality. Starting on irritated skin. Trying to combine the device with every active product you own.
If you use it once, forget it for three weeks, then compare photos and feel disappointed, that is not a product test. That is a calendar problem. If you use it over moisturizer and the device drags, that is not a results problem. That is a setup problem. If you use a tiny dot of gel and hate the feeling, that is not proof the device is wrong for you. It may be proof you need more activator.
This is why I keep pointing people back to the basics. The timeline only means anything if the routine is consistent enough to judge. You do not need perfection. You do need a fair test.
If your timeline keeps failing because you hate the gel step, NuFACE may not be your best device category. If your timeline keeps failing because the small bottle makes you ration, Aqua Gel 10 oz is the first fix I would consider before buying random substitutes.
What Not To Expect From NuFACE Before And After Photos
Do not expect a home microcurrent device to replace professional treatments. Do not expect a permanent new face from one session. Do not expect results if you use it twice and forget it for a month. Do not expect a great routine if you hate buying activator.
That sounds blunt, but it protects your money. NuFACE is a better purchase when you understand the trade: it asks for gel, time, technique, and repetition. If you want a zero-effort glow wand, NuFACE may feel too structured. If you like a serious routine, it can make more sense.
If you are comparing easier devices, read SolaWave vs NuFACE. If you want a broader device decision, read NuFACE vs Medicube vs ZIIP.
My Cart Recommendation By Timeline
If you are at Day 1 and unsure, I would buy NuFACE MINI+ and Aqua Gel. It is the cleanest starter route and keeps the pressure lower.
If you already know you want the more committed routine, buy NuFACE Trinity+ with Aqua Gel. That pairing makes sense for someone who wants microcurrent as a repeat habit, not just a curiosity.
If you are past Week 1 and your only issue is gel usage, buy Aqua Gel 10 oz. The bigger size can make you less stingy, and less stingy usually means better glide.
If your cheeks feel dry or the clear gel gets tacky too fast, compare Silk Creme. It is not the cheapest route, but it can be the more comfortable official activator route.
Should You Keep Going After 8 Weeks?
After 8 weeks, I would not ask only whether your photos look different. I would ask whether the routine earned its space.
Keep going if the device is easy enough to repeat, the gel step no longer annoys you, your skin stays calm, and you like how the routine fits into your morning or night. That is a good sign even if the photo difference is subtle.
Pause or rethink if the device keeps irritating your skin, you dread the gel, you keep skipping because setup feels too involved, or you are still chasing a dramatic change that the category was never likely to give. Sometimes the smart move is not buying more attachments. Sometimes it is admitting that you prefer a simpler glow routine.
If you are still deciding between the device paths, my cart logic stays the same. MINI+ is the easier trial. Trinity+ is the more committed NuFACE route. Aqua Gel is the clean first activator. Aqua Gel 10 oz is for the person who already knows they use enough gel. Silk Creme is for the person whose skin wants a richer official texture.
If your before-and-after question is mostly about the lower face, read does NuFACE help jawline next. It explains what NuFACE can and cannot do for jawline expectations before you buy.
If you are tracking NuFACE before-and-after photos because of jowls, read does NuFACE help jowls. It explains why lower-face photos need boring, consistent lighting.
If you are comparing photos because of under-chin fullness, read does NuFACE help double chin. The photo angle section matters before you judge results.
If your before-and-after check is focused on smile lines, read does NuFACE help nasolabial folds. It explains why lighting, makeup, and expression can make smile-line photos hard to judge.
If you are tracking forehead-line before-and-after photos, read does NuFACE help forehead wrinkles. The photo and expression traps matter before you judge results.
If your before-and-after expectations are drifting toward treatment-level change, read NuFACE vs Botox. It helps reset what a home device can fairly do.
FAQ
How long does it take to see NuFACE before and after results?
Do not judge NuFACE only from one session. Day 1 is mainly for baseline photos and learning the glide. Week 1 is for technique. Weeks 4 to 8 are a more reasonable window to compare photos and decide whether the routine fits your life.
Can NuFACE change your face after one use?
I would not buy NuFACE expecting a permanent face change after one use. Some people like how they look right after a session, but the better test is whether you can repeat the routine comfortably and consistently.
Should beginners buy NuFACE MINI+ or Trinity+?
Buy MINI+ if you want the easiest entry point. Buy Trinity+ if you already know you want a more serious microcurrent routine and are comfortable with the extra commitment.
What gel should I use for a NuFACE timeline test?
Use NuFACE Aqua Gel first so you have a clean baseline. If you use the device often, Aqua Gel 10 oz may make more sense. If clear gel feels too light or drying, compare Silk Creme.
How should I take NuFACE before and after photos?
Use the same room, lighting, camera distance, angle, expression, and time of day if possible. Take front and side photos before starting, then compare again after several weeks of consistent use.
If you are comparing NuFACE progress with a gua sha routine, read NuFACE vs gua sha. It helps separate manual massage expectations from microcurrent tracking.